Deckhouse Platform on VK Cloud (OpenStack): What can I do next?
Everything is installed and configured
The following Deckhouse Platform capabilities are available right after the installation.
By default, Dex is used for accessing all the components.
Open the cluster web interface by clicking the “Connect and open” button in the row with the created cluster on the main screen.

The web interface for managing the installed DP cluster will open in the same window.
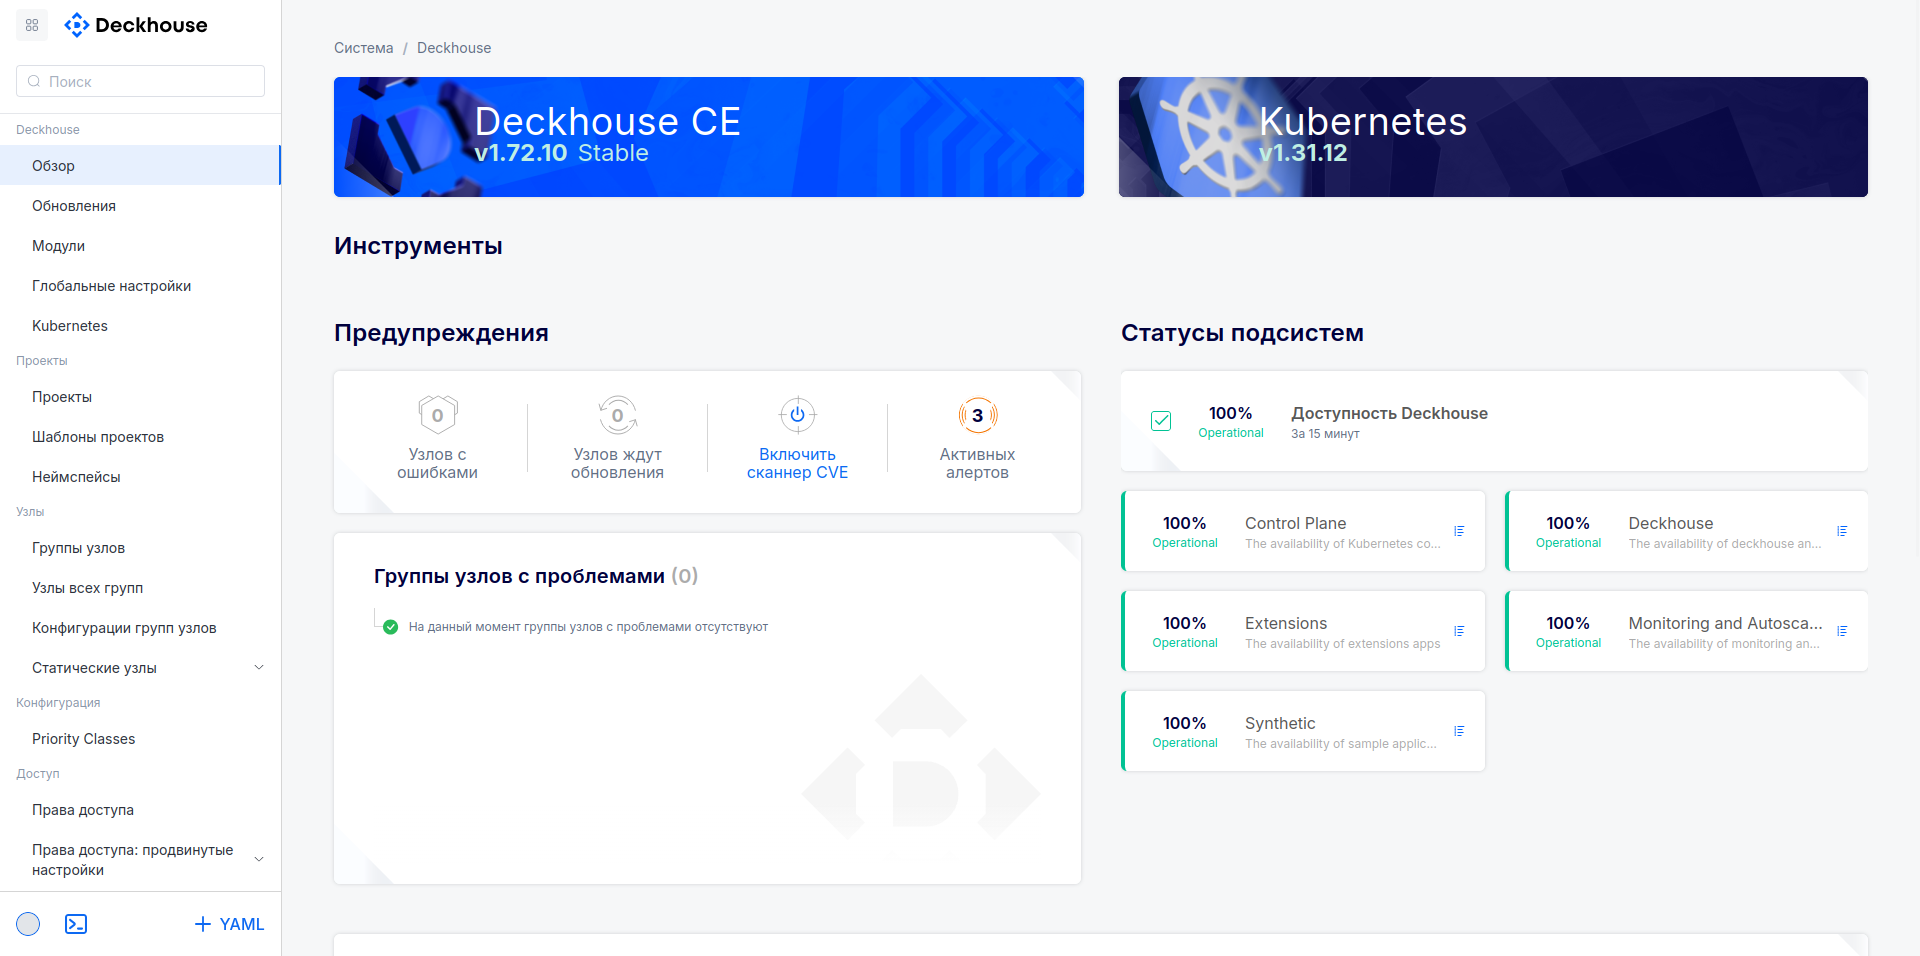
Follow these steps:
-
Install an Ingress controller.
Go to “Network” → “Load balancing” → “Ingress controllers” and create a new Ingress controller by clicking “Add” and selecting “Host port”.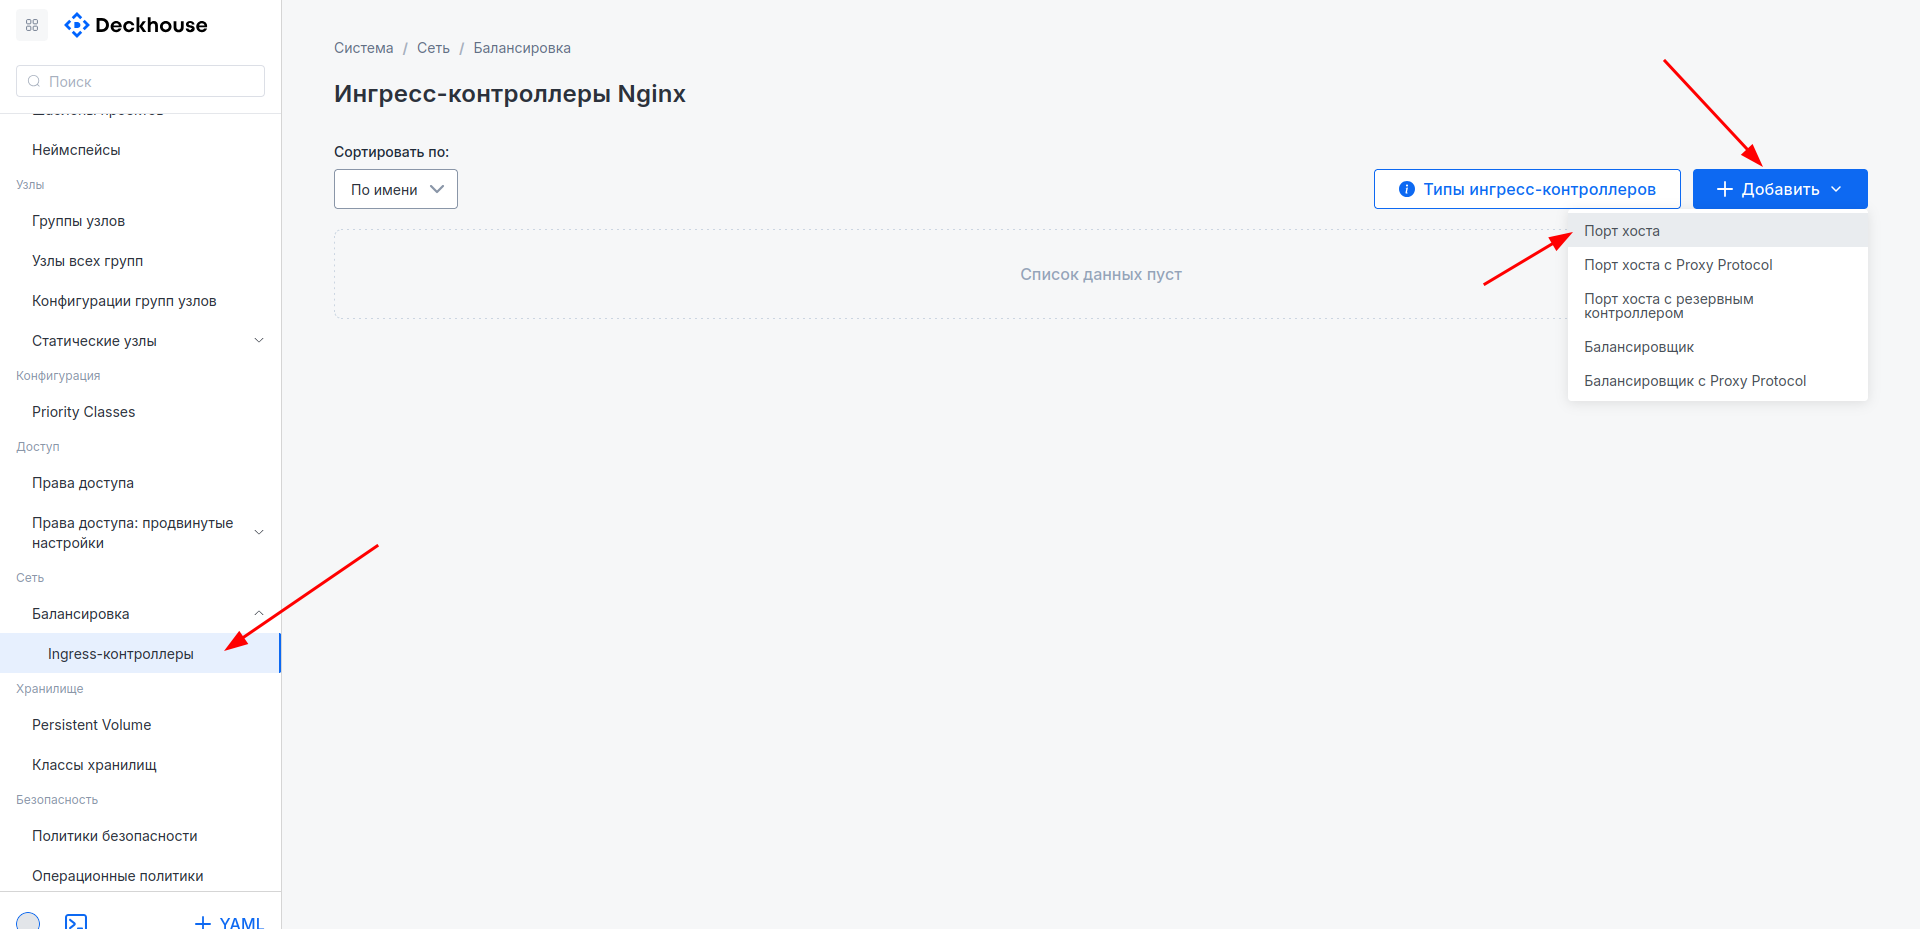
Enter a name and click “Create”.
If you need HTTPS access to cluster components, enable it in the “Default certificate” section.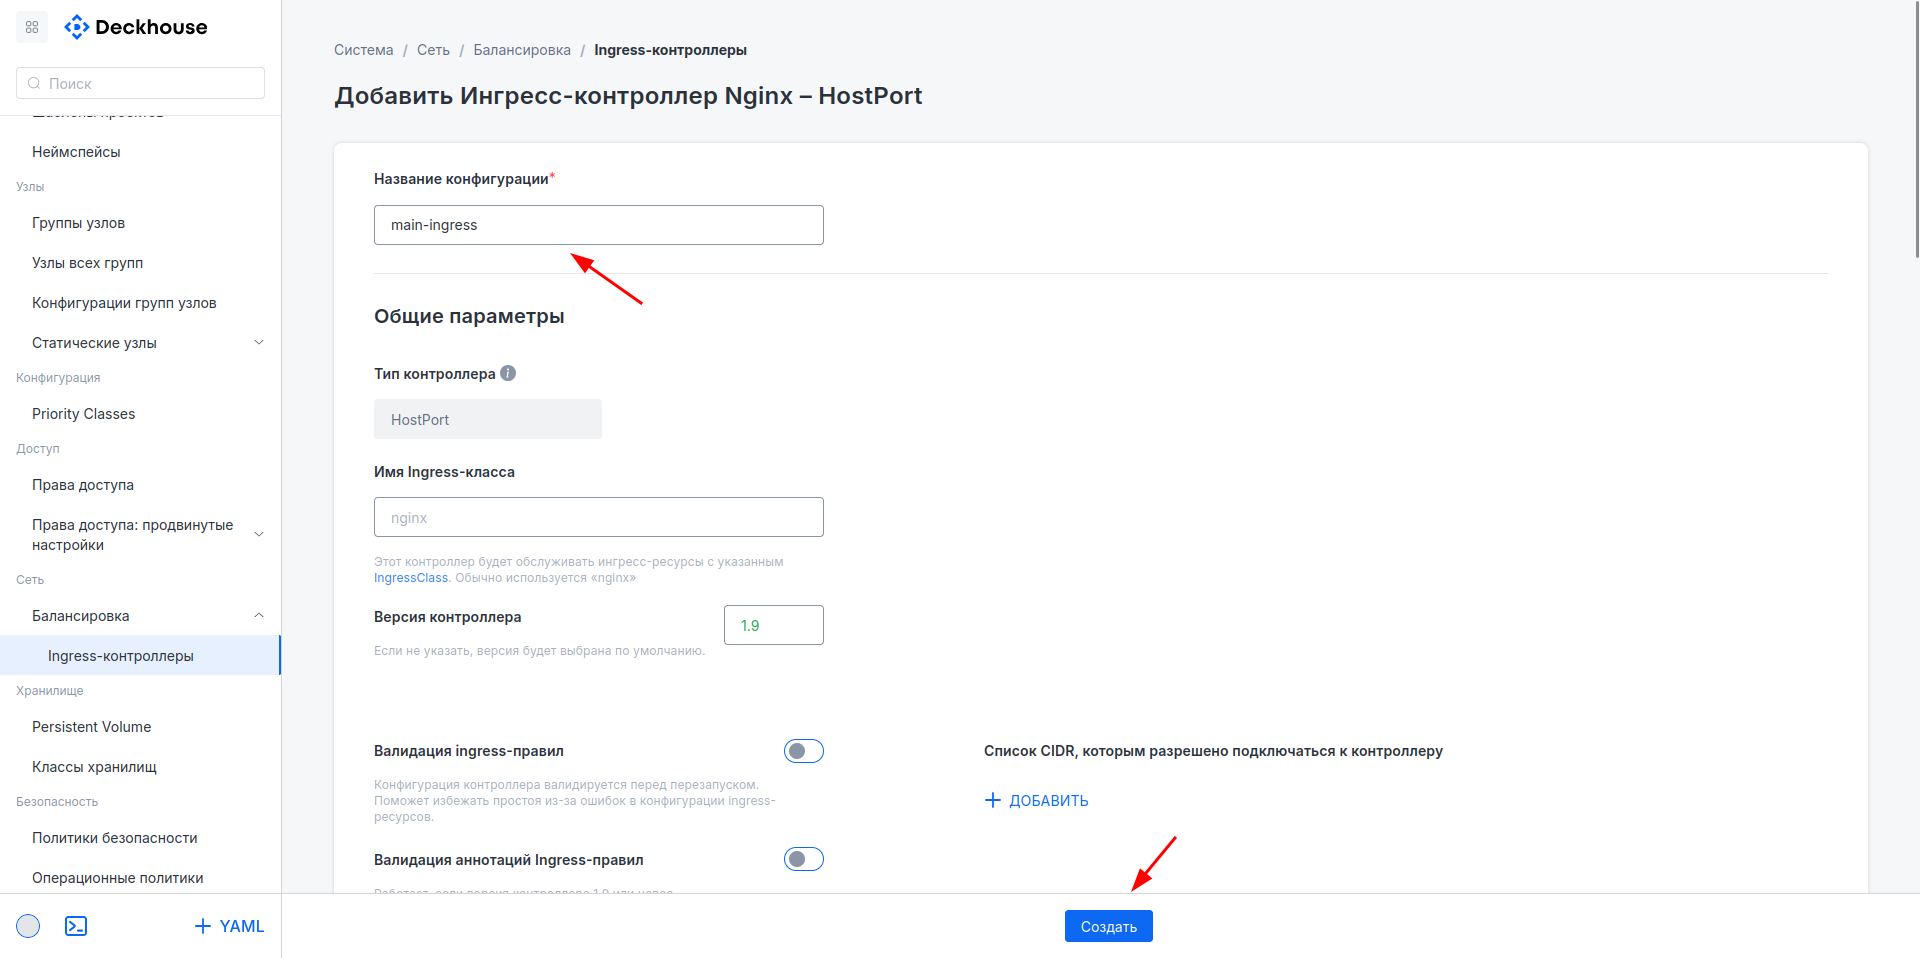
-
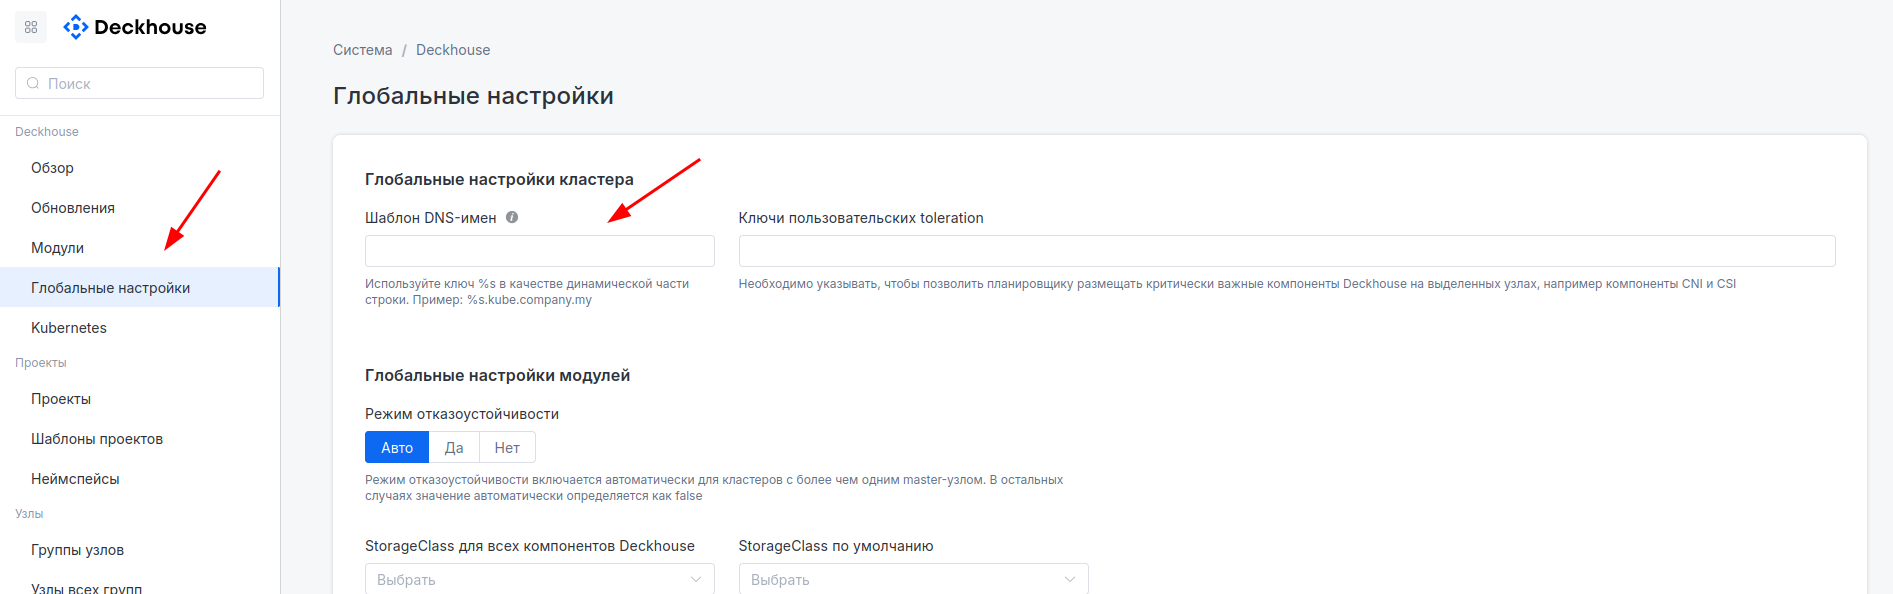
Configure the DNS name template to be used for cluster components.
The DNS name template is used to configure Ingress resources for system applications. For example, the Grafana UI is bound to the name
grafana. Then, for the template%s.kube.company.my, Grafana will be available atgrafana.kube.company.my, and so on.Go to “Deckhouse” → “Global settings” and enter the template in the “DNS name template” field.
Getting started with the cluster
Deckhouse web UI
Try the web UI for managing the cluster and its main components.
Web service name: console
📚 Documentation
Documentation for the Deckhouse Platform version installed in your cluster.
Web service name: documentation
📊 Monitoring
Explore Grafana dashboards bundled with Deckhouse.
Web service name: grafana
To access Prometheus: /prometheus/
👌 Status page
Get information about the overall status of Deckhouse and its components.
Web service name:
status
Get detailed SLA statistics for each component and time frame.
Web service name:
upmeter
🏭 Going to production
Prepare your cluster to receive traffic.
Use the production readiness checklist to make sure you haven’t forgotten anything.
Deploying your first application
⟳ Setting up a CI/CD system
Create a ServiceAccount to use for deploying to the cluster and grant it all the necessary privileges.
You can use the generated kubeconfig file in Kubernetes with any deployment system.
🔀 Routing traffic
Create a Service and Ingress for your application.
Capabilities of the module are described in the ingress-nginx module documentation.
🔍 Monitoring your application
Add prometheus.deckhouse.io/custom-target: "my-app" and prometheus.deckhouse.io/port: "80" annotations to the Service created.
For more information, see the monitoring-custom module documentation.
Other features
⚖ Managing nodes
Run the following command to list NodeGroups created in the cluster during the deployment process: d8 k get nodegroups. For more information, see the node-manager module documentation.
You only need to make changes to minPerZone and maxPerZone parameters to scale the existing groups. If these two parameters are not equal, Deckhouse Platform scales the group automatically within the specified limits.
You need to create a new InstanceClass and a NodeGroup referring to it to create new groups.
Next steps
Detailed information about the system and the Deckhouse Platform components is available in the Deckhouse Platform documentation.
Contact our online community if you have any questions.