Deckhouse Kubernetes Platform on VMware vSphere
1
Selecting infrastructure
2
Installation information
3
Starting installer
4
Preparing environment
5
Basic installation parameters
6
Cluster parameters
7
Installation
8
What can I do next?
-
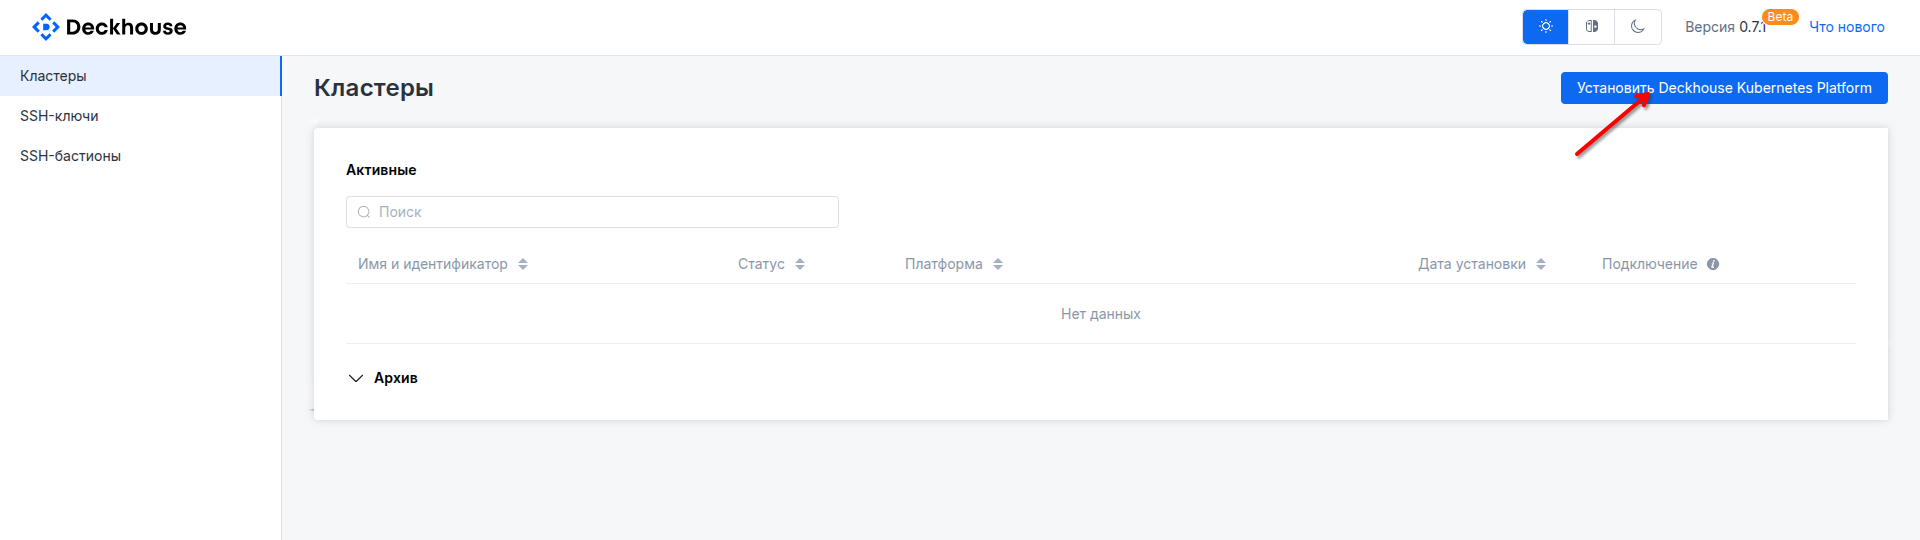
On the home page, click the "Install Deckhouse Kubernetes Platform" button.
-
Select the basic installation parameters:
- Platform edition. Community Edition is selected by default; you can choose the required edition in the "Add source" drop-down list in the center.
If you choose an edition other than Community Edition, enter a name (any value) and the license key you received in the window that opens.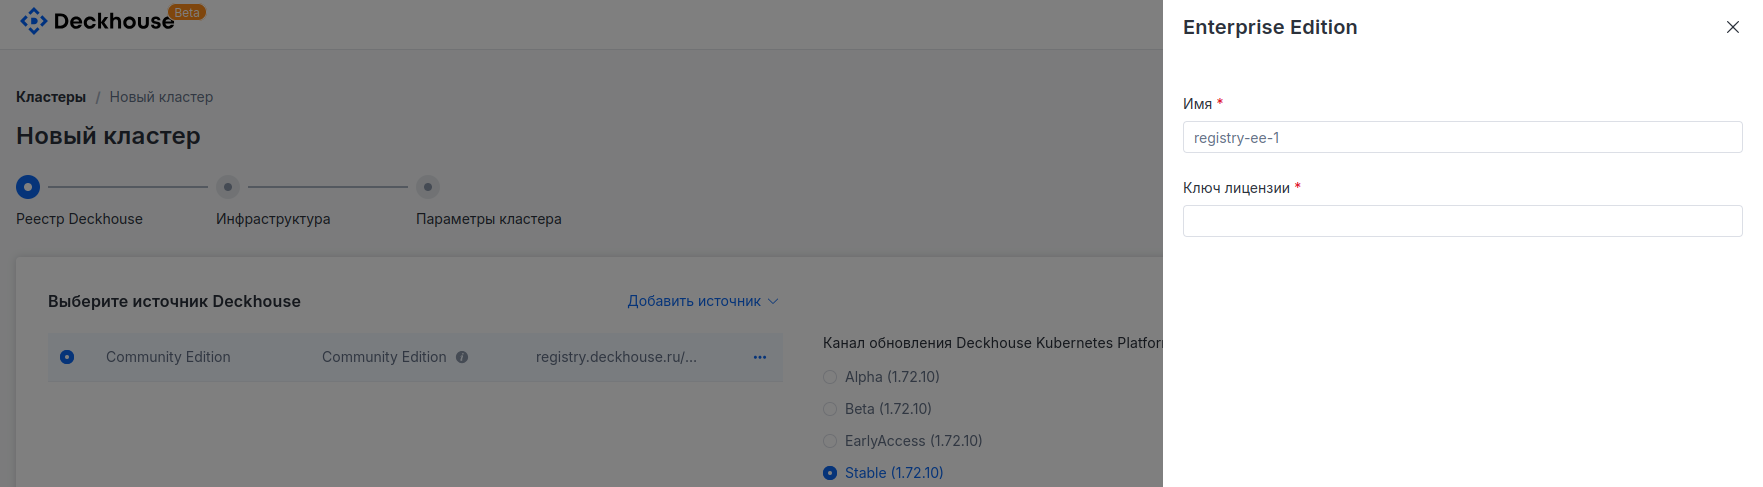
- Deckhouse Kubernetes Platform update channel. Stable is selected by default.
- Kubernetes version. By default, the "Auto" mode is selected, which chooses the currently recommended version.
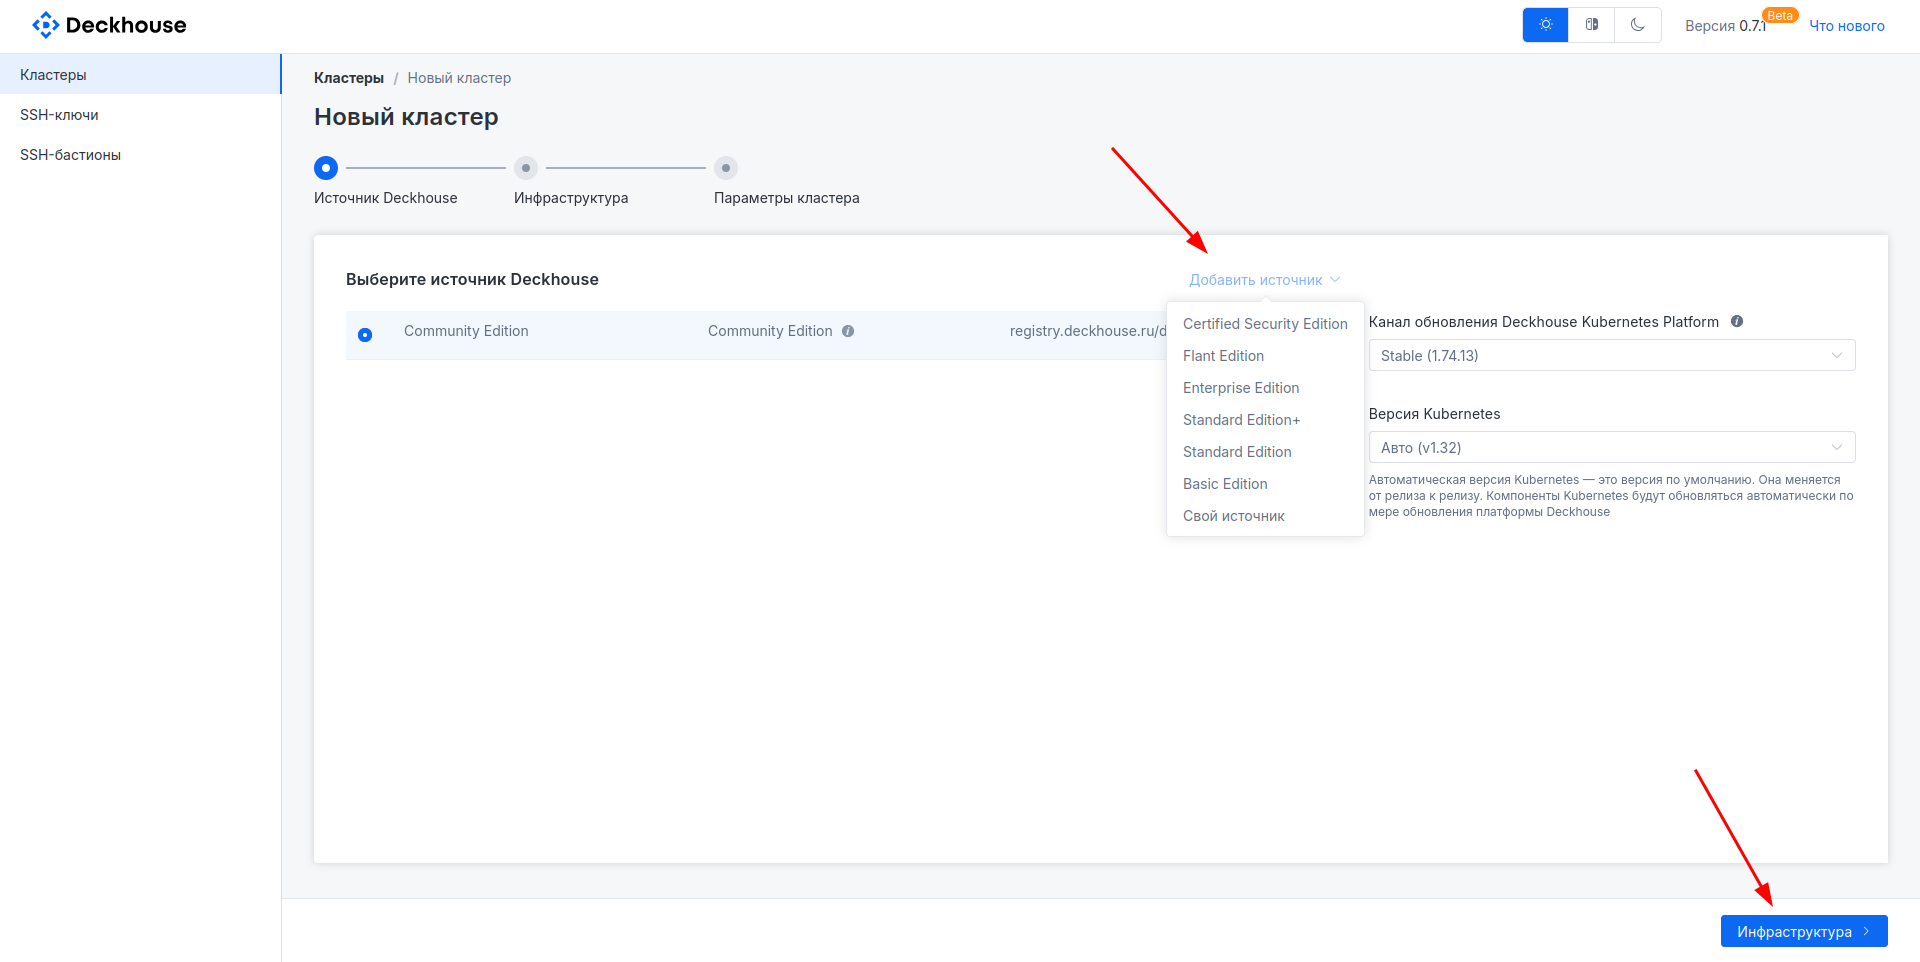
Then click the "Infrastructure" button to proceed to the next step.
- Platform edition. Community Edition is selected by default; you can choose the required edition in the "Add source" drop-down list in the center.
-
In the "Add infrastructure" drop-down list at the top of the page, select the required cloud platform.
In this list, available cloud providers depend on the selected DKP edition.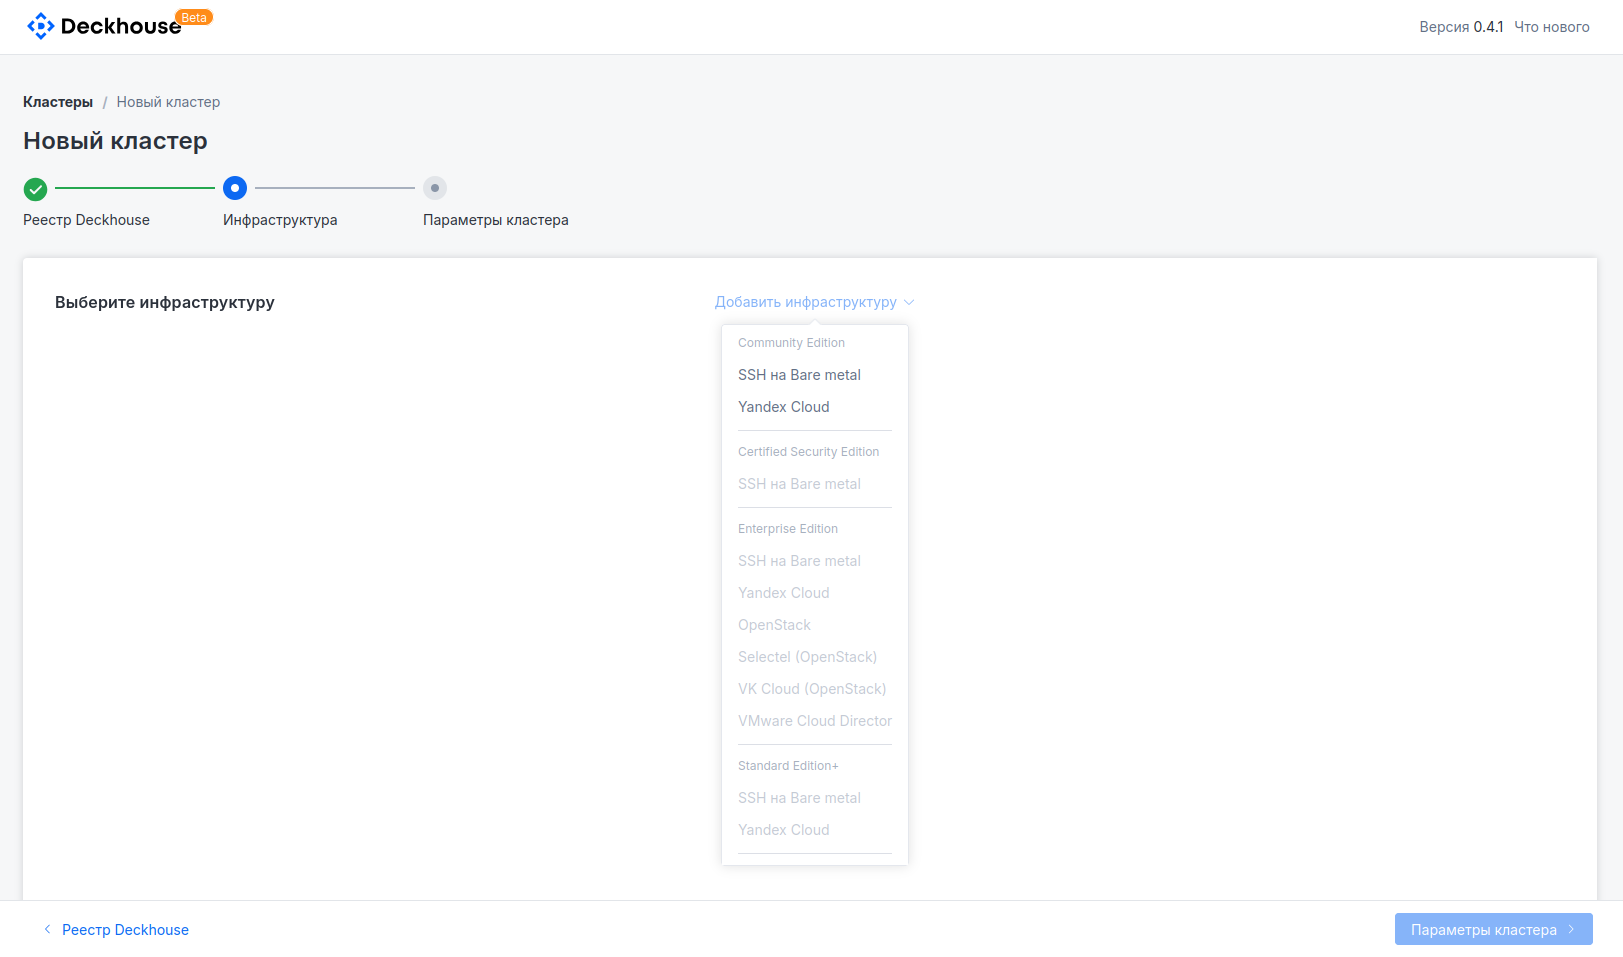
-
In the panel that opens on the right, enter the required cloud provider connection parameters.
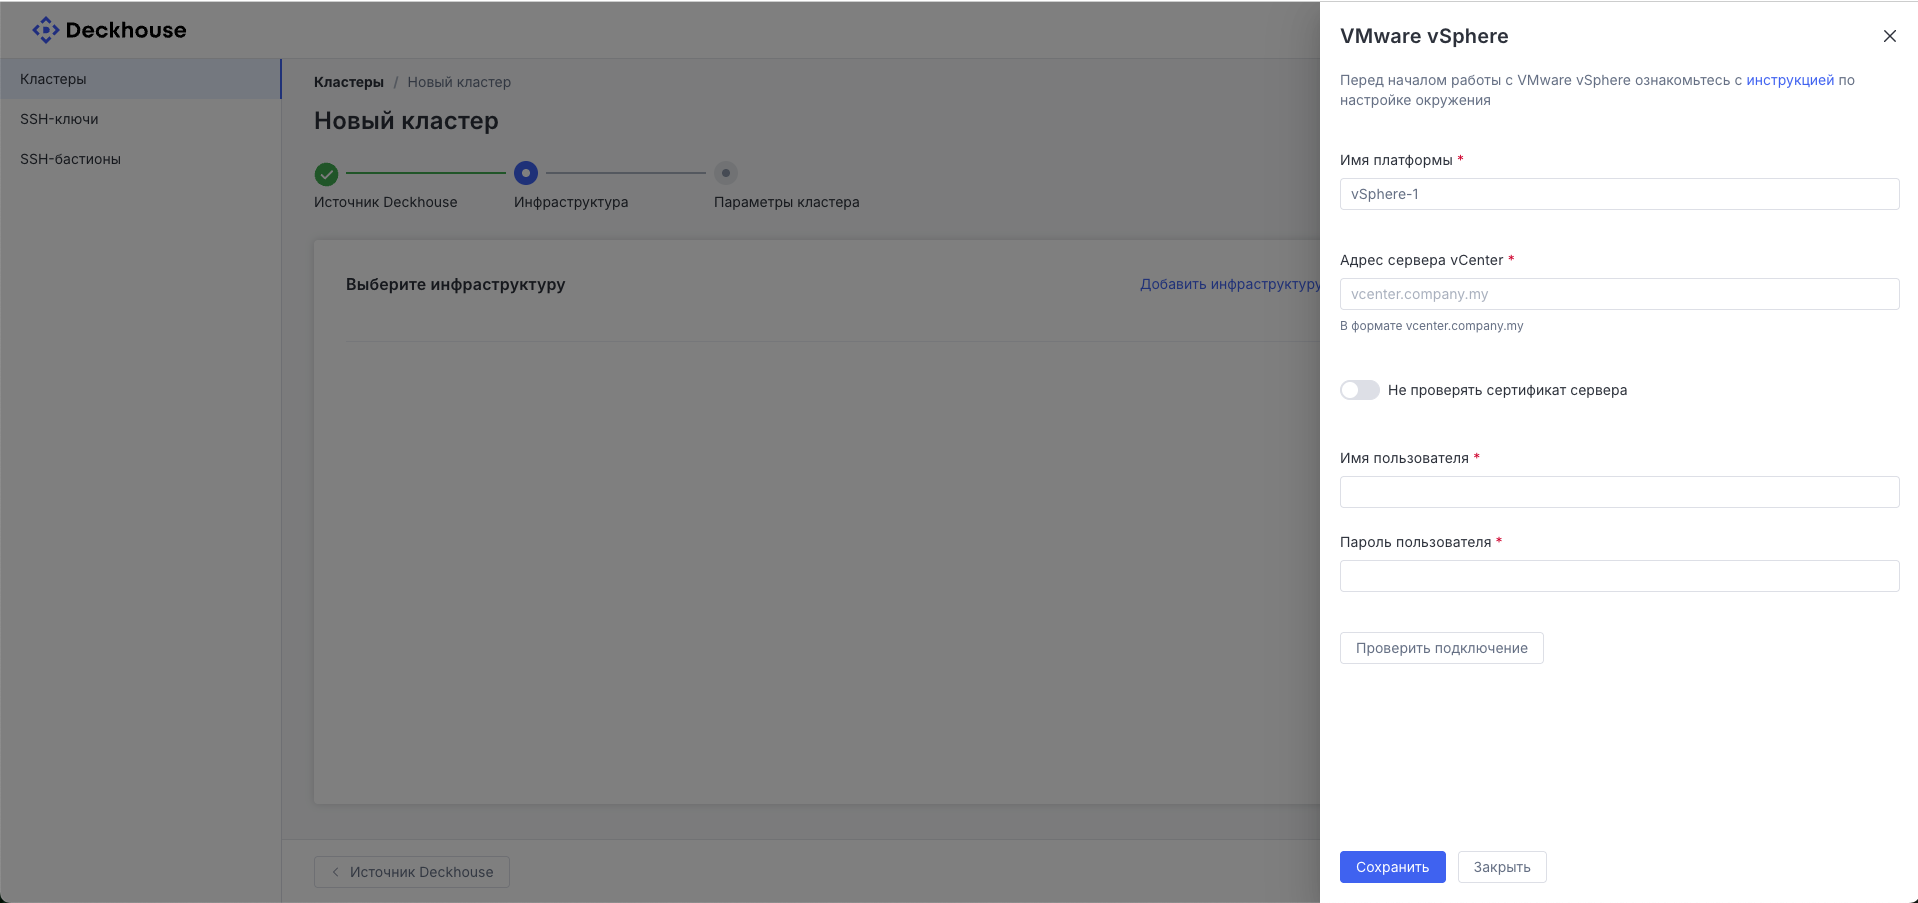
Click the "Save" button.
- The created infrastructure appears in the list on the main screen. Select the required item (if multiple options were created) and click the "Cluster parameters" button.
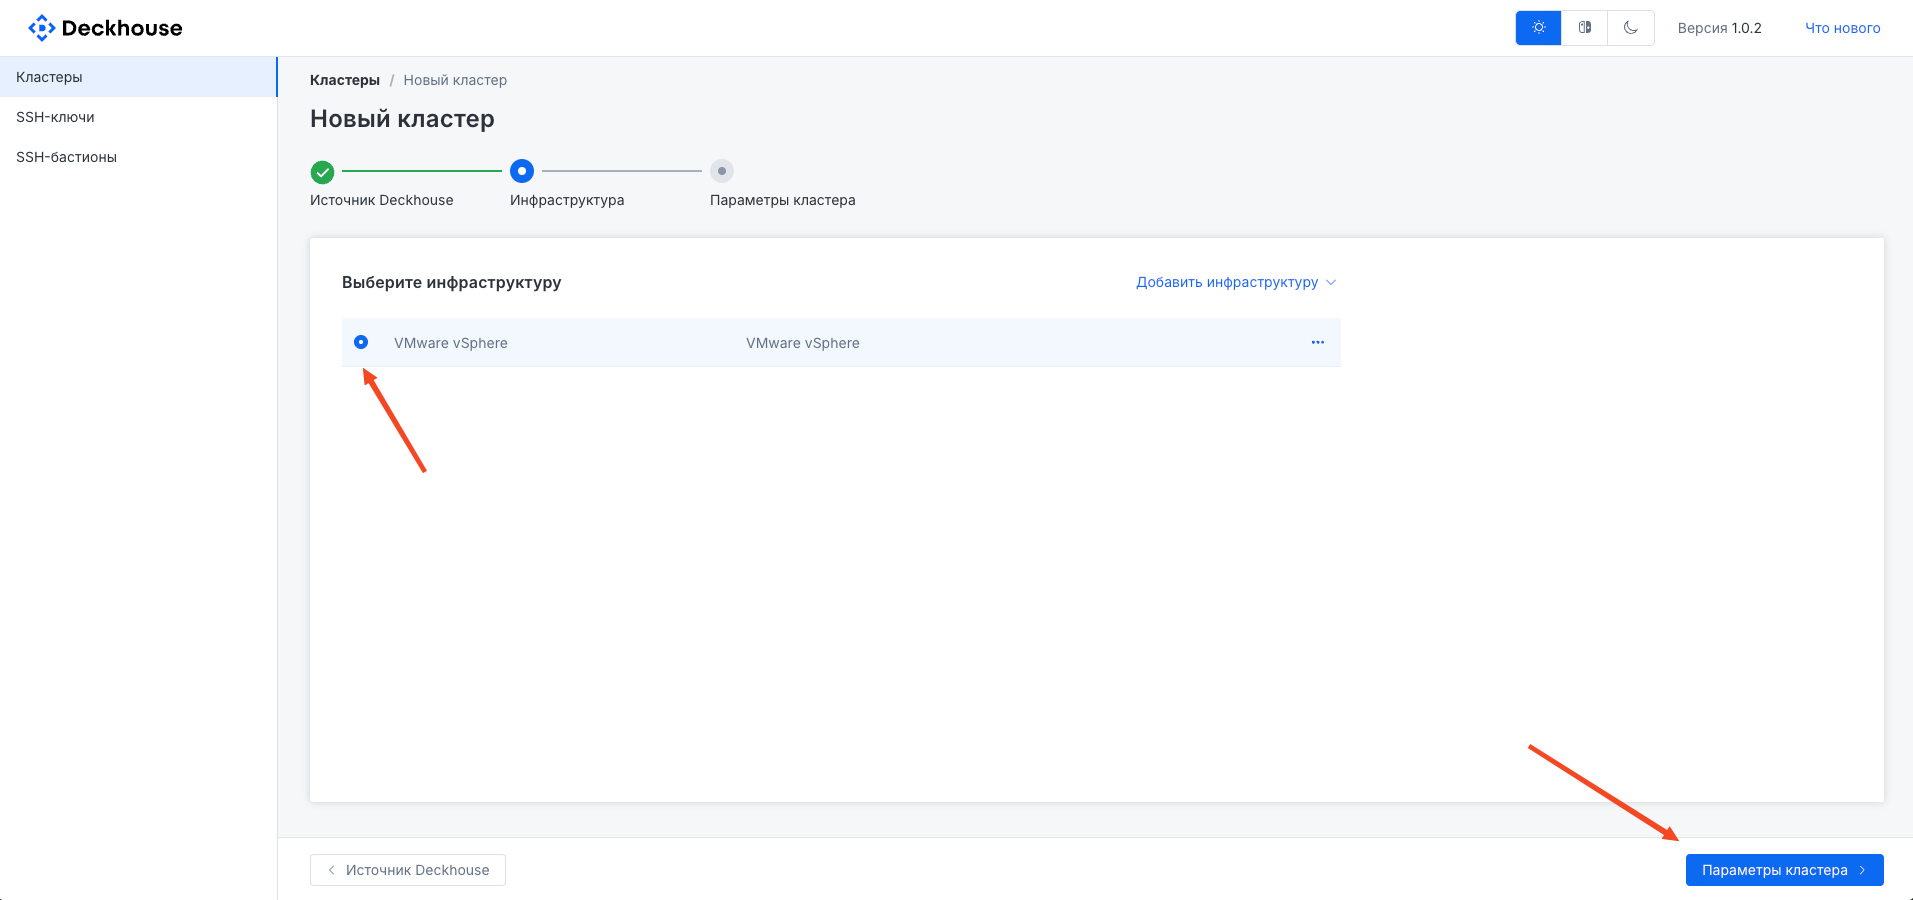
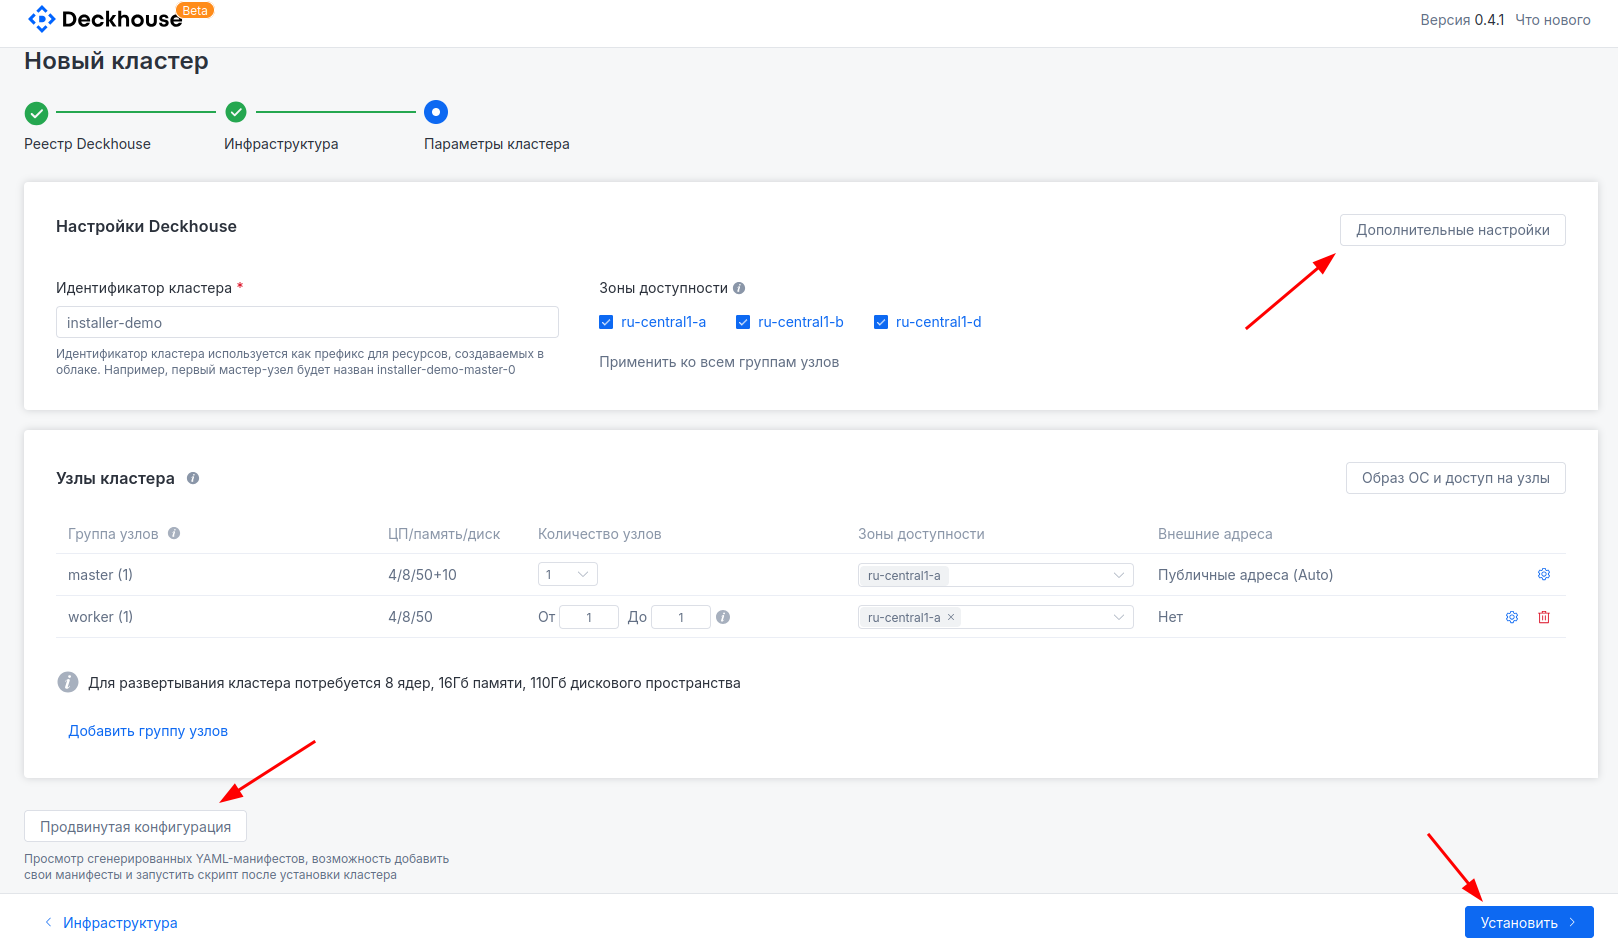
- Set the cluster name and specify the parameters of the requested machines for future cluster nodes.
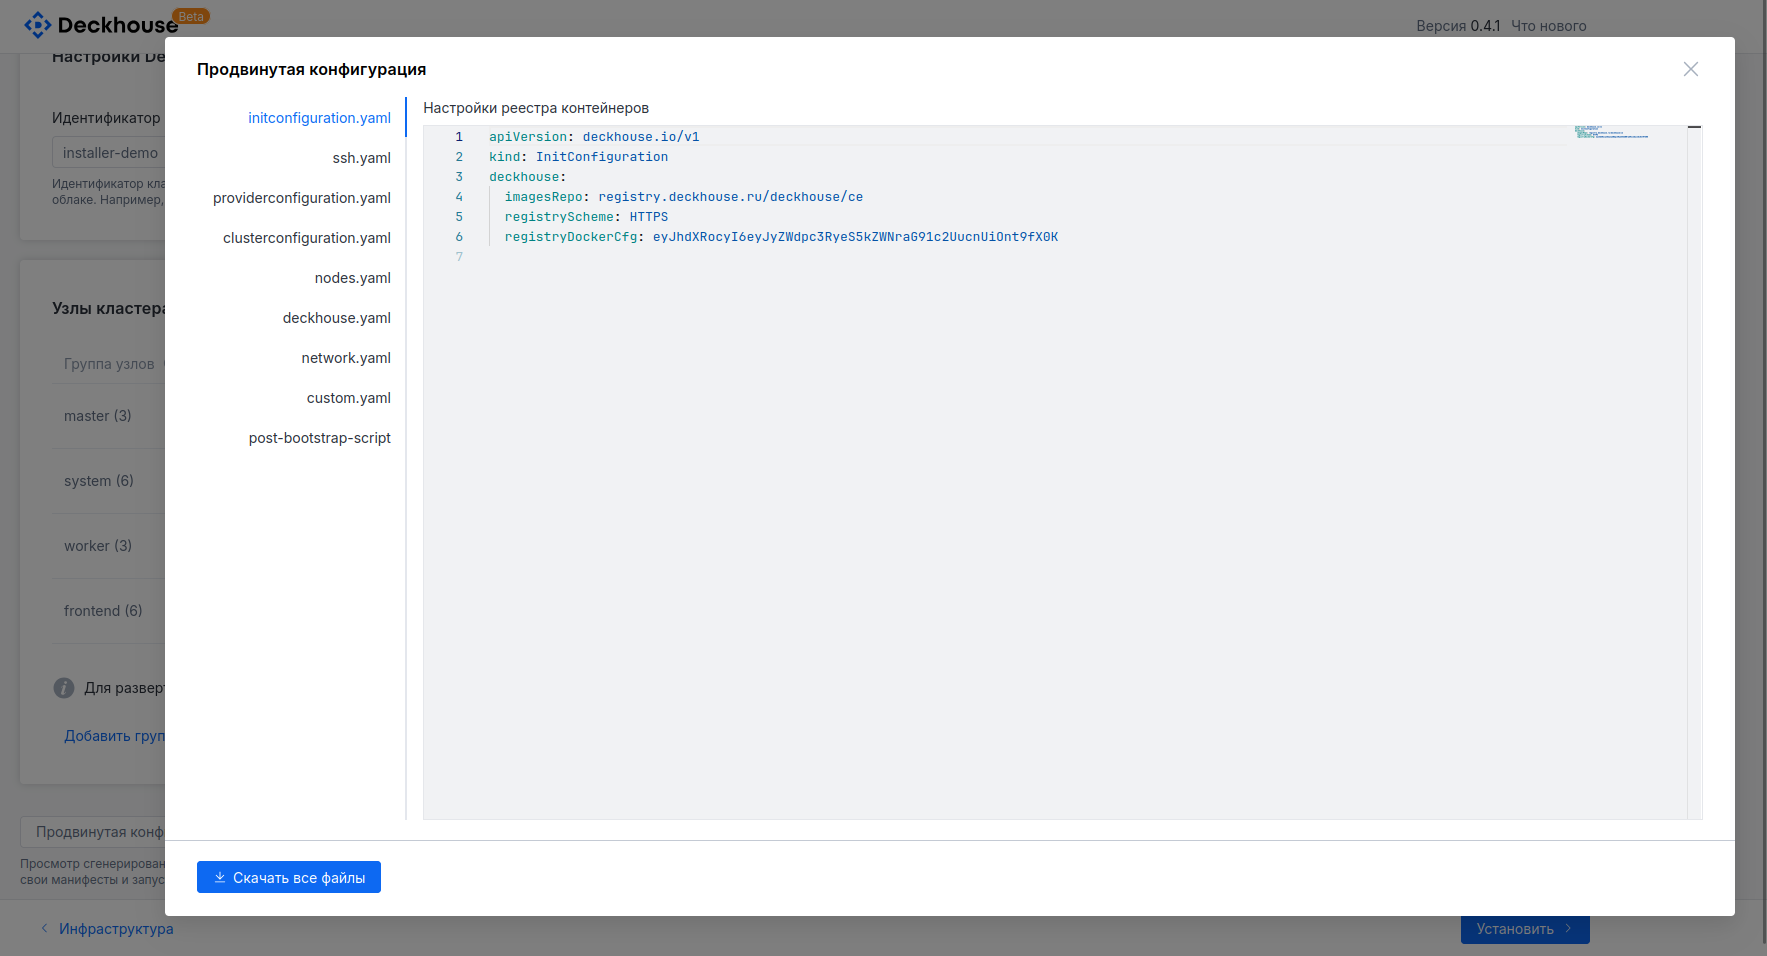
Advanced future cluster settings, such as placement scheme or subnet configuration, are available after clicking the "Additional settings" button.The "Advanced configuration" button on the left side of the screen lets you view and download generated YAML configuration files. This may be required to run dhctl manually using these files.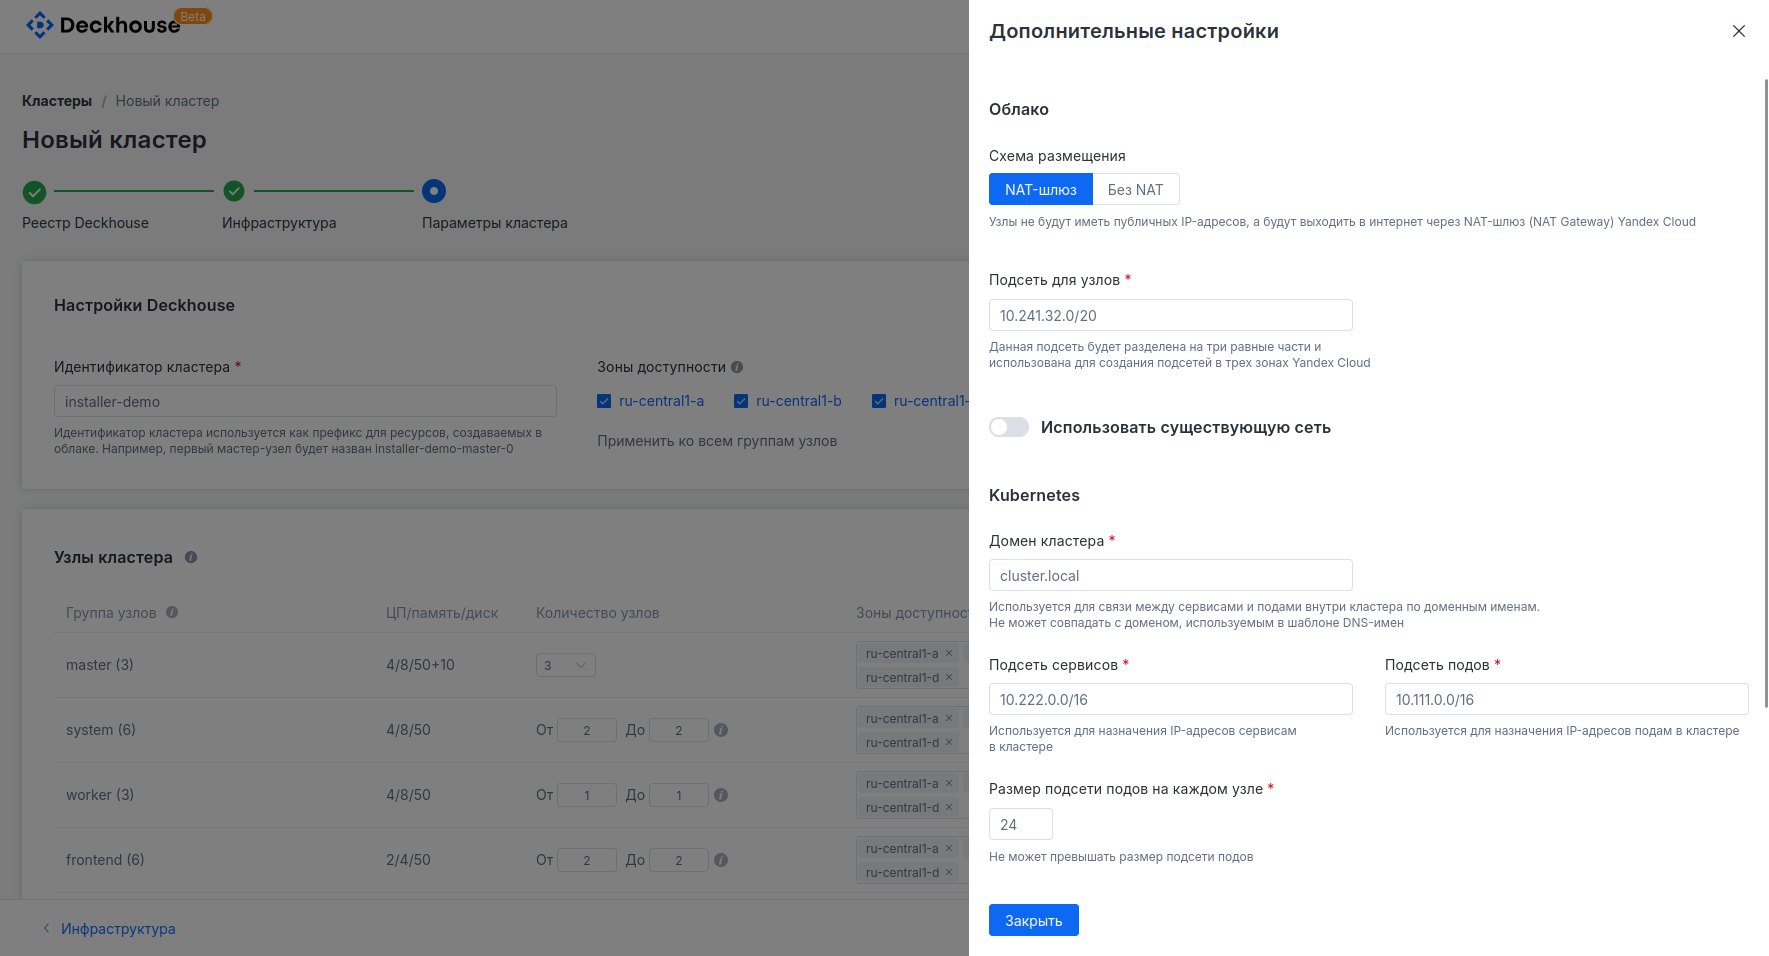 Click the "Install" button.